If you’ve ever done some research into sharpening your knives well so that they come out the best versions of themselves again, chances are you have come across the word ‘burr’ more times than you care to remember. It seems that everywhere you turn, someone is mentioning it as part of their knife sharpening checks and rituals.
So, what is a burr on a knife in the first place, what does it look like, and why should you care?
Knife burrs form at the other edge of the blade when sharpening the first edge on the whetstone. This piece of plastic-like metal forms to show that the edge being sharpened is being done at the right angle, also indicating that the other edge is ready for sharpening.
Read on to find out more about knife burrs and how to draw one on your knife.
Table of Contents
What Does A Burr on A Knife Look Like?
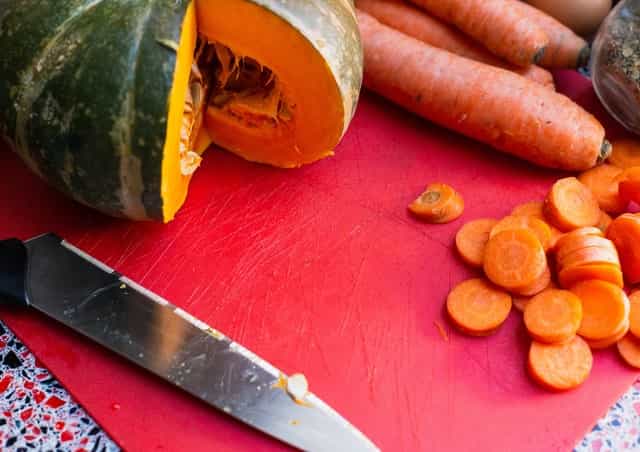
It would be difficult to explain what a burr on a knife feels like without showing you what it looks like. I went digging and I found this really helpful photo to show you what to expect if you can draw a burr on your knife.
As you can see from that image, the burr of the knife forms on the opposite side of the edge you just sharpened.
Why Is the Burr Important in Sharpening?
Stainless steel, which is the choice material for the majority of the knives out there, is malleable. This is why you can sharpen your stainless-steel knives with abrasive movements that shave off some parts of the metal to bring a sharper edge from underneath.
Now, when sharpening the knife, you need to ensure that the entire length of the edge, up to the tip of the knife, is being run on the whetstone. Otherwise, you would have uneven sharp edges and might get a bald spot on the tip or other parts of the edge.
When a burr forms, you know that that edge has been sharpened all the way. How so, you ask?
The burr represents a gentle collection of all the metal shavings that the abrasive sharpener has caused. When it collects uniformly to the top, it forms a single continuous layer called the burr. This gives you the nod to go ahead and sharpen the other side since that edge you are on has reached a fine state – for now, at least.
Overall, you cannot get a sharp knife if the burr does not form while sharpening. Note that I did not say that the knife won’t be sharp at all, but it won’t be as sharp as it can be. That also means not keeping its edge for long, leading to more sharpening and ruining of the blade.
How to Feel A Burr on A Knife
During any knife handling of any kind, I am always big on practicing good knife safety practices. I have seen how dangerous these tools can be when not handled right, so make sure to only try this if you are confident you can pull it off safely.
If you want to feel the burr on the knife-edge after sharpening, in case you cannot see the small shavings with your naked eye, follow these steps:
- Step 1 – Put your thumb on the side of the knife opposite to the one you were just sharpening
- Step 2 – Gently slide your finger away from the spine of the knife to the edge.
- Step 3 – If you smoothly move your finger to the edge of the knife, there is no burr. If there is a slight catch at all, that is the burr you just felt.
NEVER move your thumb along the edge of the knife or from the edge to the spine. That is how you get cut faster than you can blink.
For alternative methods of checking the burr, you can check out this fine video that I found where more (and safer) methods are tested:
Alternatively, you can use a magnifying lens to check for the burrs on your knife, but that sounds a little bit like overkill to me.
Now, the fact that there is a burr on one side of the edge does not mean that the burr is everywhere. Make sure to check different areas across the length of the blade to see that there is a burr formation.
Do You Want A Burr on A Knife?
In most cases and with most of the knives that I have dealt with, the answer is yes.
A burr tells you that the knife blade has been sharpened to the very edge, just like you want it. The burr also indicates you are sharpening at the right angle since an absence could mean you are sharpening at too low of an angle or behind the edge of the knife.
From the above alone, a burr sounds like a foolproof way to evaluate your sharpening techniques so you are never ruining the knife more than you are helping it during the sharpening process.
That said, not all knife steels will raise a burr (or one you can notice) no matter how much you sharpen them. VG-10 steel, for example, will sharpen just fine without giving you a burr many times.
This does not mean that the steel is bad for knives (it is used on some Shun knives and they are plenty good) but the characteristics of the steel do not allow that. Yet another reason to make sure to know the core steel of whatever knife you are buying so you can better understand its performance, toughness, and other important considerations.
How Do You Sharpen Knives That Do Not Raise A Burr?
Most times, it comes down to experience when you can feel that a side is sharp enough to allow you to work on the other side. Before you build up that kind of dexterity and experience, though, there’s another neat hack you can use.
Count the number of sharpening strokes used for each side of the knife as you sharpen. Replicate the same sharpening movement at the same angle, and with the same number of strokes, on the other business end of the knife.
Repeat that and you won’t have to worry about getting the sharpening wrong. So, if you make 10 passes on the whetstone with one side of the blade, pause and do the same for the other side. Remember to keep the angle and pressure consistent.
Note that this is only for those core steels that do not raise a burr, or don’t raise a noticeable one either.
Why Do You Need to Remove A Burr?
Isn’t it funny that we took all the time to make sure a burr is formed, but we have to remove it too?
When the burr forms to tell you that an edge has been sharpened well, it also creates a protective coating over the other edge’s apex. This prevents the other edge from cutting to the maximum sharpness even if it were sharp underneath.
Using the knife with a burr would almost be like driving a car with the covers still on. The car still moves, but you don’t see anything and you are greatly restricted in movement.
After sharpening from side to side with the whetstone (or any other sharpening tool you choose), make sure to remove the burr before using the knife again.
How Do You Get Rid of Burrs on A Knife?
There are two different methods that I recommend. I have already mentioned one of these in my guide to whetstone sharpening where I recommended using progressively finer stones to finish a sharpening process.
So, if you started with a 1000-grit whetstone, for example, progress into a 600-grit whetstone and a 400-grit package to finish the job.
If you have ever wondered why professional sharpeners switch the grits, now you know. By repeating the sharpening motion on finer whetstones, you are not necessarily sharpening the knife anymore but removing the metal debris and burrs. This, in turn, makes the knife sharper too.
Some good whetstones come with a finer grit level on the flipside. Use that to your advantage.
Likewise, stropping eliminates burrs from the knife, so you should try it out. I don’t know why more people aren’t into stropping their knives since most knives would be sharper for it.
The interesting thing is that stropping is easy – and you can follow this guide to learn how to do it effectively too.
Fun fact: Even if you use finer stones after the coarse stones, you would still need to strop the knife to get rid of the wire edge/ flaky final burr that remains on the edge.
Mistakes to Avoid When ‘Chasing the Burr’
Getting a burr is important, but you can also ruin your knife while chasing it.
Here are a couple of mistakes you want to avoid in this case:
- Make sure you are not looking for burrs on a knife core steel that doesn’t ensure their formation (such as VG-10)
- Avoid applying too much pressure to the sharpening just to get a burr formed
- Don’t always look for burrs when reprofiling a bevel. It is more applicable when sharpening the knife
- Avoid sharpening the knife down which causes the wire edge kind of burrs. These leave the knife dull, not sharp.
- Don’t switch sharpening angles when looking for a burr. Keep to the recommended angles.
- A burr is not rushed. Take your time with it and you should get better (and faster) at finding it later.
- Above all else, never feel for the burr by touching the knife’s edge with your bare hands, or unsafely.
With that, you are good to go on getting the best knife burrs where possible, and realizing sharper knives for it.